Re: Autonomous Navigation
Posted by matlabbe on
URL: http://official-rtab-map-forum.206.s1.nabble.com/Autonomous-Navigation-tp801p805.html
2) I will re-verify for the alignment. "grid_map" is also faster to generate.
3) Well, I have never tried move_base without setting any parameters, but on my side I have:
For this simplified launch, the topics used for navigation are "/tf", "/odom" (not sure about "/odom" though, since it can be get with tf), "/move_base/simple_goal" and "/cmd_vel". I'll show next how to setup the /map for the global costmap and obstacle_layer for the local costmap.
For the stereo navigation tutorial, there is a mismatch with the yaml files on GitHub and the ones shown on the page. You should refer to yaml files shown on the tutorial page to reproduce exactly the experience. Note that remapping arguments under move_base is for remapping those in the yaml files.
For your robot configuration, I've made here some yaml files to help you (I omitted obstacle detection for simplification):
EDIT: expected_update_rate should be 0.1 instead of 10. It is in seconds, not Hz.
local_costmap_params.yaml
global_costmap_params.yaml
base_local_planner_params.yaml
navigation.launch
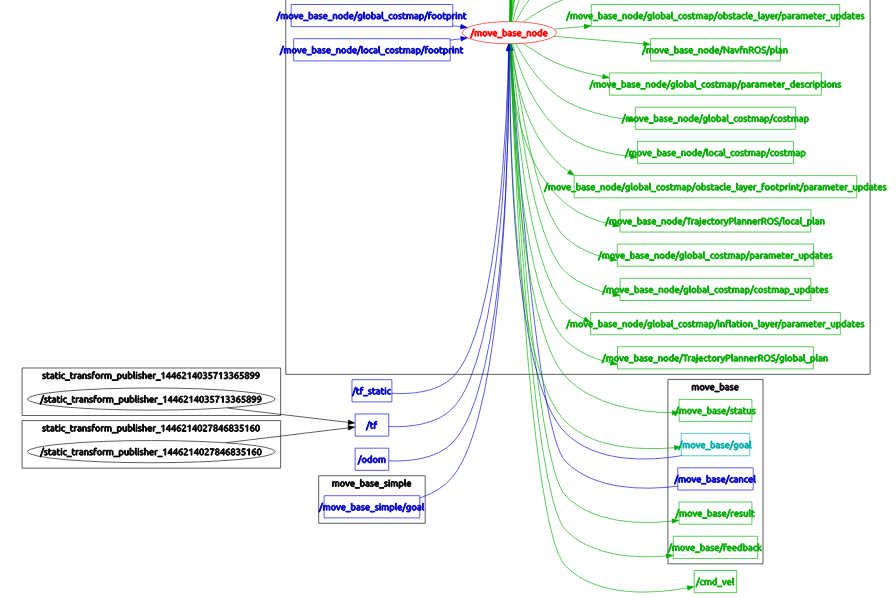
You then have this rqt_graph:
Hope this will help to get you starting with navigation!
cheers,
Mathieu
URL: http://official-rtab-map-forum.206.s1.nabble.com/Autonomous-Navigation-tp801p805.html
2) I will re-verify for the alignment. "grid_map" is also faster to generate.
3) Well, I have never tried move_base without setting any parameters, but on my side I have:
$ roscore

Create fake TF to make move_base working (only for testing!)
$ rosrun tf static_transform_publisher 0 0 0 0 0 0 /odom /base_link 100
$ rosrun tf static_transform_publisher 0 0 0 0 0 0 /map /odom 100

$ rosrun move_base move_base
For this simplified launch, the topics used for navigation are "/tf", "/odom" (not sure about "/odom" though, since it can be get with tf), "/move_base/simple_goal" and "/cmd_vel". I'll show next how to setup the /map for the global costmap and obstacle_layer for the local costmap.
For the stereo navigation tutorial, there is a mismatch with the yaml files on GitHub and the ones shown on the page. You should refer to yaml files shown on the tutorial page to reproduce exactly the experience. Note that remapping arguments under move_base is for remapping those in the yaml files.
For your robot configuration, I've made here some yaml files to help you (I omitted obstacle detection for simplification):
EDIT: expected_update_rate should be 0.1 instead of 10. It is in seconds, not Hz.
Files
costmap_common_params.yaml (notice the "observation_sources" parameter)
footprint: [[ 0.3,  0.3], [-0.3,  0.3], [-0.3, -0.3], [ 0.3, -0.3]]
footprint_padding: 0.02
inflation_layer:
  inflation_radius: 0.5
transform_tolerance: 2

obstacle_layer:
  obstacle_range: 2.5
  raytrace_range: 3
  max_obstacle_height: 0.4
  track_unknown_space: true

  observation_sources: laser_scan_sensor

  laser_scan_sensor: {
    data_type: LaserScan,
    topic: scan,
    expected_update_rate: 0.1,
    marking: true,
    clearing: true
  }
local_costmap_params.yaml
global_frame: odom
robot_base_frame: base_footprint
update_frequency: 2
publish_frequency: 2
rolling_window: true
width: 3.0
height: 3.0
resolution: 0.025
origin_x: 0
origin_y: 0

plugins:
  - {name: obstacle_layer,   type: "costmap_2d::ObstacleLayer"}
  - {name: inflation_layer,  type: "costmap_2d::InflationLayer"}
global_costmap_params.yaml
global_frame: map
robot_base_frame: base_footprint
update_frequency: 2
publish_frequency: 2
always_send_full_costmap: false
plugins:
   - {name: static_layer, type: "rtabmap_ros::StaticLayer"}
   - {name: obstacle_layer, type: "costmap_2d::ObstacleLayer"}
   - {name: inflation_layer, type: "costmap_2d::InflationLayer"}
base_local_planner_params.yaml
TrajectoryPlannerROS:

  # Current limits based on AZ3 standalone configuration.
  acc_lim_x:  0.75
  acc_lim_y:  0.75
  acc_lim_theta: 4
  max_vel_x:  0.5
  min_vel_x:  0.24
  max_vel_theta: 0.5
  min_vel_theta: -0.5
  min_in_place_vel_theta: 0.25
  holonomic_robot: true

  xy_goal_tolerance:  0.25
  yaw_goal_tolerance: 0.25
  latch_xy_goal_tolerance: true

  # make sure that the minimum velocity multiplied by the sim_period is less than twice the tolerance on a goal. Otherwise, the robot will prefer to rotate in place just outside of range of its target position rather than moving towards the goal.
  sim_time: 1.5 # set between 1 and 2. The higher he value, the smoother the path (though more samples would be required).
  sim_granularity: 0.025
  angular_sim_granularity: 0.05
  vx_samples: 12
  vtheta_samples: 20

  meter_scoring: true

  pdist_scale: 0.7 # The higher will follow more the global path.
  gdist_scale: 0.8
  occdist_scale: 0.01
  publish_cost_grid_pc: false

#move_base
controller_frequency: 10.0 #The robot can move faster when higher.

#global planner
NavfnROS:
    allow_unknown: true
    visualize_potential: false
navigation.launch
<launch>
  <arg name="scan_topic" default="/scan"/>
  <arg name="map_topic" default="/map"/>

  <!-- ROS navigation stack move_base -->
  <remap from="scan"             to="$(arg scan_topic)"/>  <!-- see costmap_common_params_2d.yaml -->
  <remap from="map"              to="$(arg map_topic)"/>   <!-- see global_costmap_params.yaml -->

  <node pkg="move_base" type="move_base" respawn="true" name="move_base" output="screen">
     <param name="base_global_planner" value="navfn/NavfnROS"/>
     <rosparam file="$(env HOME)/costmap_common_params.yaml" command="load" ns="global_costmap" />
     <rosparam file="$(env HOME)/costmap_common_params.yaml" command="load" ns="local_costmap" />
     <rosparam file="$(env HOME)/local_costmap_params.yaml" command="load" ns="local_costmap" />
     <rosparam file="$(env HOME)/global_costmap_params.yaml" command="load" ns="global_costmap"/>
     <rosparam file="$(env HOME)/base_local_planner_params.yaml" command="load" />
  </node>
</launch>
Example
If you put all these files in $HOME path and launch navigation.launch like the following:$ roslaunch freenect_launch freenect.launch depth_registration:=true $ rosrun depthimage_to_laserscan depthimage_to_laserscan image:=/camera/depth_registered/image_raw camera_info:=/camera/depth_registered/camera_info $ rosrun tf static_transform_publisher 0 0 0 0 0 0 /base_footprint /camera_link 100 $ roslaunch rtabmap_ros rgbd_mapping.launch frame_id:=base_footprint rtabmap_args:="--delete_db_on_start" rtabmapviz:=false subscribe_scan:=true $ roslaunch navigation.launch map_topic:=/rtabmap/grid_map $ roslaunch rtabmap_ros demo_turtlebot_rviz.launch (In RVIZ, you can add TF and change map topic to "/rtabmap/grid_map", you can also send goals to actually see the planned path and some commands published from move_base over /cmd_vel topic)
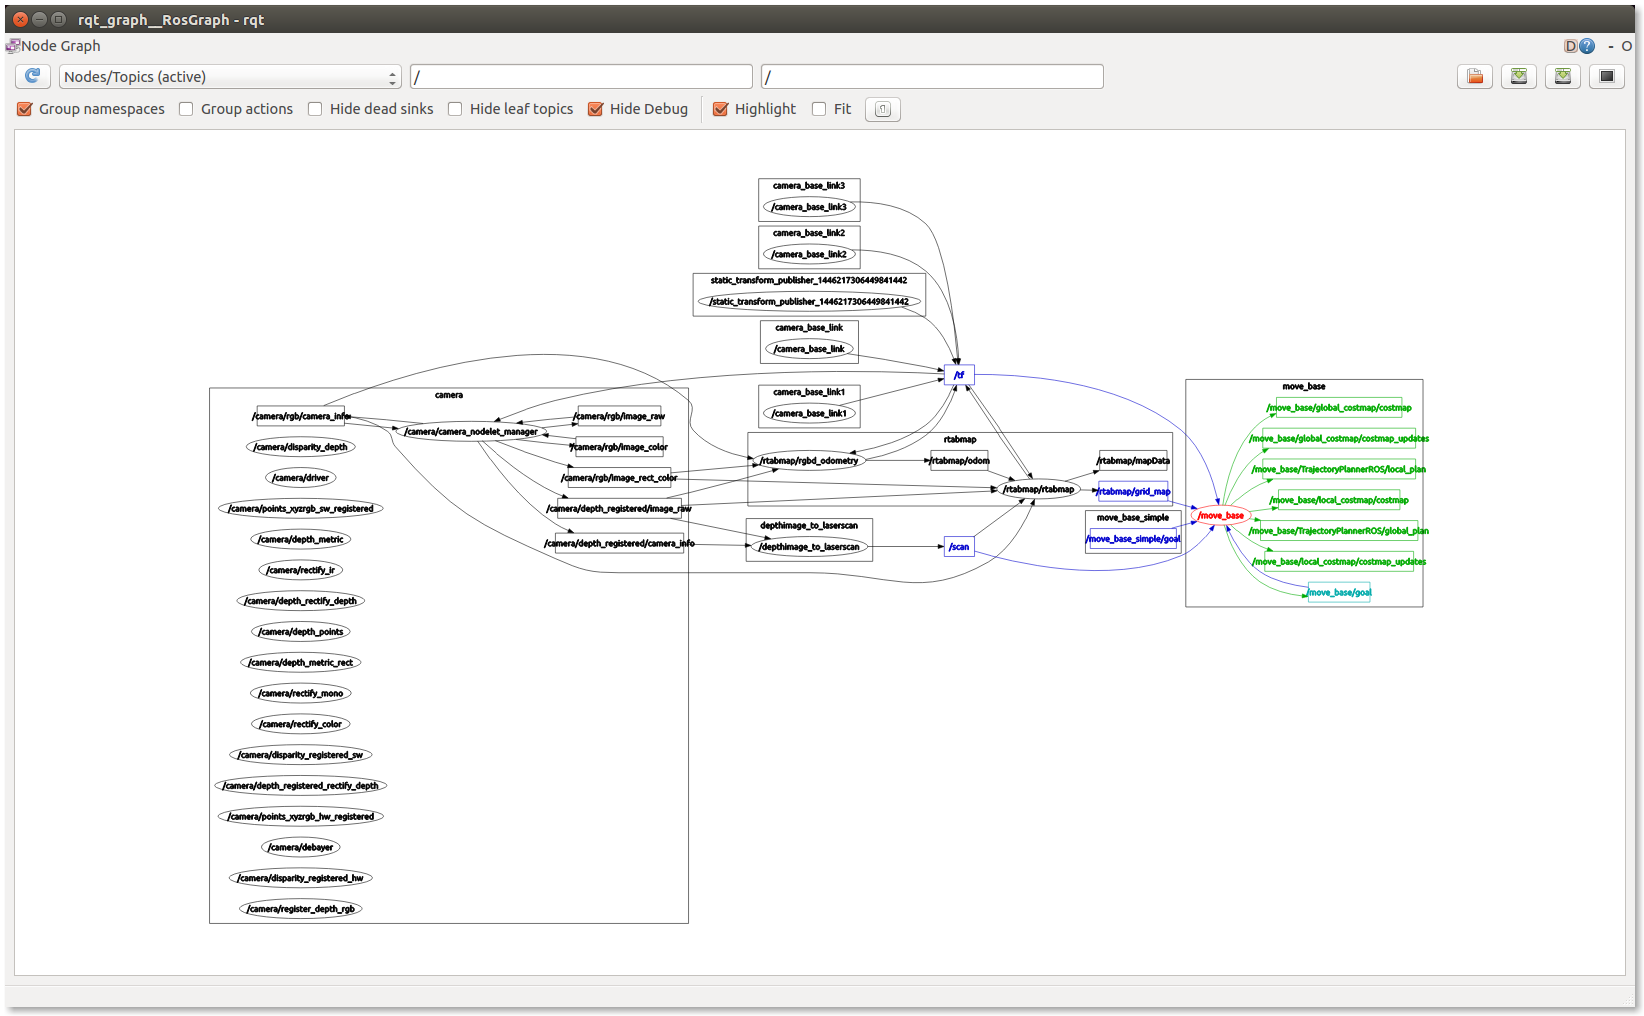
You then have this rqt_graph:
Hope this will help to get you starting with navigation!
cheers,
Mathieu
| Free forum by Nabble | Edit this page |