Re: Autonomous Navigation
Posted by matlabbe on
URL: http://official-rtab-map-forum.206.s1.nabble.com/Autonomous-Navigation-tp801p827.html
Hi,
Great that you make it work!
1) The reason I used depthimage_to_laserscan is to provide /scan to move_base at high frame rate for its local costmap (obstacle detection). Outputting /scan from rtabmap would not be enough fast.
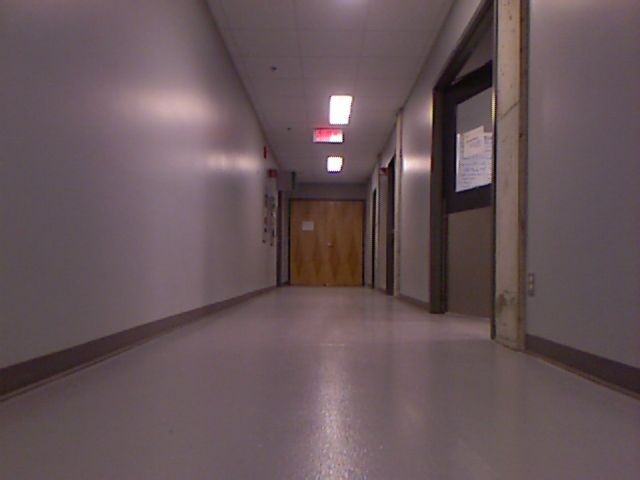
2) The camera should see the ground to fill "empty" cells. If the ground is too reflective (depending on the angle), less points will be found on the ground. To have more projections on the ground, you may also want to deactivate map filtering by setting map_filter_radius to 0:
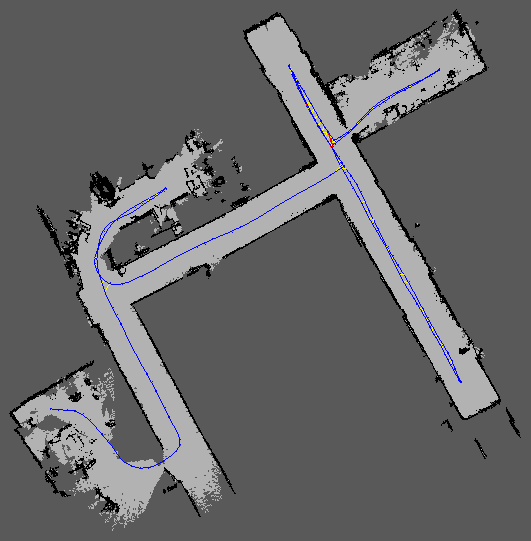
/rtabmap/grid_map (in this case a laser rangefinder was used)
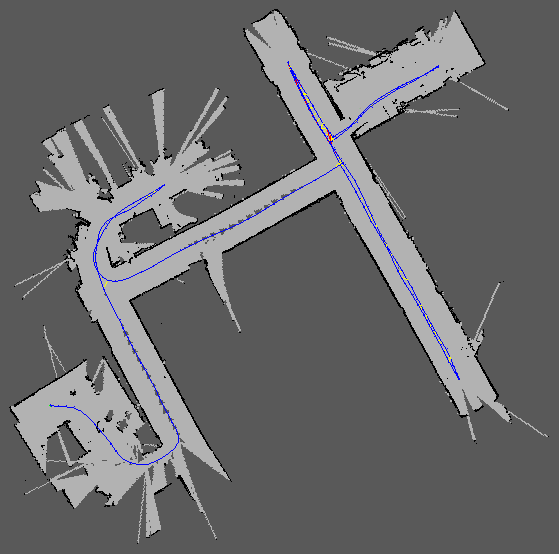
/rtabmap/proj_map
3) You can throttle the images at lower framerate and use "theora" image_transport for more compression. Similar to bandwidth efficiency section in the tutorials, for convenience, you can use rtabmap_ros/data_throttle nodelet by setting "rate" and "decimation" parameters:
4) Normally, if you use the rtabmap_ros/MapGraph or rtabmap_ros/MapCloud plugins, you should subscribe to /rtabmap/mapGraph and /rtabmap/mapData topics respectively. As these topics are published, you should see the map created in RVIZ.
5) I was referring to obstacles_detection nodelet of rtabmap. But yes, the /scan topic is used to create the local costmap, and thus, to avoid obstacles. Using obstacles_detection helps to detect low objects on the ground, for which the /scan topic cannot detect. To use it, you must change the "costmap_common_params.yaml" for (note that the expected_update_rate for the laser should be "0.1" instead of "10" (it is in seconds not Hz)):
move_base uses plugins to provide functionalities. You should look in the referred plugins page. For example, for the obstacle_layer, see here. This page is linked from costmap_2d page (see Layer specifications section).
6) I've found all the parameters with the move_base tutorials and wiki pages of its plugins. For a better understanding on how they are used, I've looked in the code of the navigation stack too.
7) There is the "scan_height" parameter that can be increased. If you want to modify its behavior, you can still clone the code and make your changes.
cheers,
Mathieu
URL: http://official-rtab-map-forum.206.s1.nabble.com/Autonomous-Navigation-tp801p827.html
Hi,
Great that you make it work!
1) The reason I used depthimage_to_laserscan is to provide /scan to move_base at high frame rate for its local costmap (obstacle detection). Outputting /scan from rtabmap would not be enough fast.
2) The camera should see the ground to fill "empty" cells. If the ground is too reflective (depending on the angle), less points will be found on the ground. To have more projections on the ground, you may also want to deactivate map filtering by setting map_filter_radius to 0:
<node type="rtabmap" ...
<param name="map_filter_radius" type="double" value="0"/>
</node>
For comparison, here some results from the Multi-session demo.
/rtabmap/grid_map (in this case a laser rangefinder was used)
/rtabmap/proj_map
3) You can throttle the images at lower framerate and use "theora" image_transport for more compression. Similar to bandwidth efficiency section in the tutorials, for convenience, you can use rtabmap_ros/data_throttle nodelet by setting "rate" and "decimation" parameters:
<group ns="camera">
    <!-- Attaching to nodelet manager from OpenNI: camera_nodelet_manager -->
    <node pkg="nodelet" type="nodelet" name="data_throttle" args="load rtabmap/data_throttle camera_nodelet_manager" output="screen">
      <param name="rate" type="double" value="5.0"/>
      <param name="decimation" type="int" value="2"/>

      <remap from="rgb/image_in"       to="rgb/image_rect_color"/>
      <remap from="depth/image_in"     to="depth_registered/image_raw"/>
      <remap from="rgb/camera_info_in" to="rgb/camera_info"/>

      <remap from="rgb/image_out"       to="rgb/image_rect_color_throttle"/>
      <remap from="depth/image_out"     to="depth_registered/image_raw_throttle"/>
      <remap from="rgb/camera_info_out" to="rgb/camera_info_throttle"/>
    </node>
  </group>
4) Normally, if you use the rtabmap_ros/MapGraph or rtabmap_ros/MapCloud plugins, you should subscribe to /rtabmap/mapGraph and /rtabmap/mapData topics respectively. As these topics are published, you should see the map created in RVIZ.
5) I was referring to obstacles_detection nodelet of rtabmap. But yes, the /scan topic is used to create the local costmap, and thus, to avoid obstacles. Using obstacles_detection helps to detect low objects on the ground, for which the /scan topic cannot detect. To use it, you must change the "costmap_common_params.yaml" for (note that the expected_update_rate for the laser should be "0.1" instead of "10" (it is in seconds not Hz)):
footprint: [[ 0.3,  0.3], [-0.3,  0.3], [-0.3, -0.3], [ 0.3, -0.3]]
footprint_padding: 0.02
inflation_layer:
  inflation_radius: 0.5
transform_tolerance: 2

obstacle_layer:
  obstacle_range: 2.5
  raytrace_range: 3
  max_obstacle_height: 0.4
  track_unknown_space: true

  observation_sources: laser_scan_sensor point_cloud_sensorA point_cloud_sensorB

  laser_scan_sensor: {
    data_type: LaserScan,
    topic: scan,
    expected_update_rate: 0.1,
    marking: true,
    clearing: true
  }

  point_cloud_sensorA: {
    sensor_frame: base_footprint,
    data_type: PointCloud2,
    topic: obstacles_cloud,
    expected_update_rate: 0.5,
    marking: true,
    clearing: true,
    min_obstacle_height: 0.04
  }

  point_cloud_sensorB: {
    sensor_frame: base_footprint,
    data_type: PointCloud2,
    topic: ground_cloud,
    expected_update_rate: 0.5,
    marking: false,
    clearing: true,
    min_obstacle_height: -1.0 # make sure the ground is not filtered
  }
Then in the launch file, you need to provide "obstacles_cloud" and "ground_cloud" topics with obstacles_detection:
<group ns="camera">
   <!-- Attaching to nodelet manager from OpenNI: camera_nodelet_manager -->
   <!-- use topics from data_throttle at lower frame rate -->
   <node pkg="nodelet" type="nodelet" name="points_xyz_planner" args="load rtabmap_ros/point_cloud_xyz camera_nodelet_manager">
      <remap from="depth/image"            to="depth_registered/image_raw_throttle"/>
      <remap from="depth/camera_info"      to="rgb/camera_info_throttle"/>
      <remap from="cloud"                  to="cloudXYZ" />
      <param name="decimation" type="int" value="1"/>                     <!-- already decimated in data_throttle above -->
      <param name="max_depth" type="double" value="3.0"/>
      <param name="voxel_size" type="double" value="0.02"/>
    </node>

    <node pkg="nodelet" type="nodelet" name="obstacles_detection" args="load rtabmap_ros/obstacles_detection camera_nodelet_manager">
      <remap from="cloud" to="cloudXYZ"/>
      <remap from="obstacles" to="/obstacles_cloud"/> <!-- move_base topic -->
      <remap from="ground"    to="/ground_cloud"/>    <!-- move_base topic -->

      <param name="frame_id" type="string" value="base_footprint"/>
      <param name="map_frame_id" type="string" value="map"/>
      <param name="wait_for_transform" type="bool" value="true"/>
      <param name="min_cluster_size" type="int" value="20"/>
      <param name="max_obstacles_height" type="double" value="0.4"/>
    </node>
</group>
move_base uses plugins to provide functionalities. You should look in the referred plugins page. For example, for the obstacle_layer, see here. This page is linked from costmap_2d page (see Layer specifications section).
6) I've found all the parameters with the move_base tutorials and wiki pages of its plugins. For a better understanding on how they are used, I've looked in the code of the navigation stack too.
7) There is the "scan_height" parameter that can be increased. If you want to modify its behavior, you can still clone the code and make your changes.
cheers,
Mathieu
| Free forum by Nabble | Edit this page |